We bought our home two years ago and although the house itself was in pristine condition, it needed some serious face lifting. Our house was built in 1918, so it doesn't lack charm and unique character. I was in love with my house the minute I stepped foot inside the front door - I knew without a doubt that we would live here. However, I hated the kitchen. It was drab and dark and dated.
The second we closed on the house and got the keys, we were in the kitchen giving it some much needed help. We had a budget of around $100 for the kitchen when we initially purchased the house, so not much to work with.
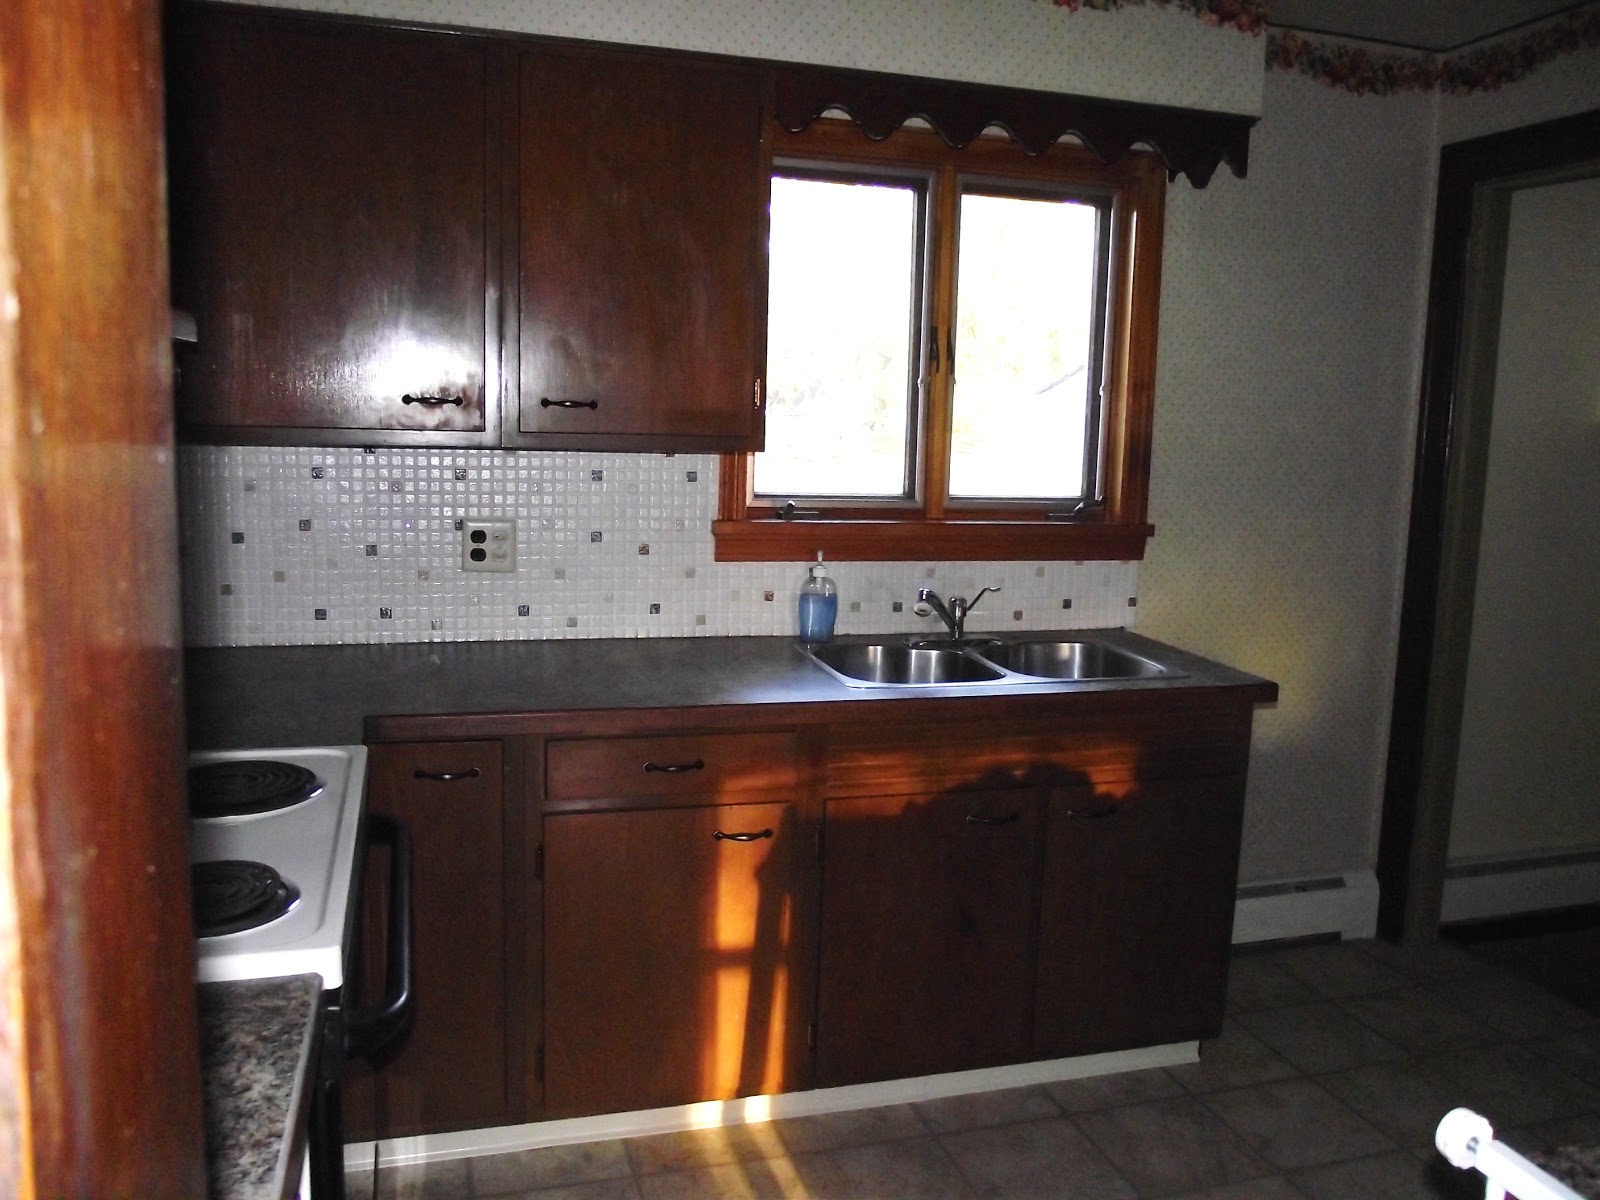
Here's the kitchen the day we bought the house. I want to smack the person who thought the multi-colored tile was a good idea.
I wanted to replace the back splash but because of our obnoxiously low budget, I couldn't. So, I used two coats of Gripper primer, then I put on two coats of an antique white. If you have a small budget, painting tile is super affordable and still gives you a great look.


After the paint on the tile. :)
Typically in an old house you will have plaster walls - and our house is no exception. The wallpaper on the plaster was NOT coming off. We had planned on removing the wall paper and painting the wall. However, we had to improvise when the wallpaper wouldn't budge. I found a textured paint-able wallpaper at Home Depot that was very affordable. This would help hide the bumps in the OLD wallpaper that wouldn't come down, AND give us the painted look we wanted. Win win!

I wish I had a better picture of the 'after' for the wallpaper, but our camera sucked back then. This was the finished product after the painted tile and the updated wallpaper.
A year or so later, we decided that the kitchen was still too dark and drab. I decided to paint the cabinets. This is by far the BEST and cheapest way to update your kitchen. Our cabinets are in great condition and very much fit the house, but for such a small space, they were too dark.

See? Too dark.

Start off by labeling ALL of your cabinets so you don't have to guess where they go when it's time to put them back on.
Remove all the cabinets and sand them down. You don't have to sand them down to the bones, just get the top layer of stain off to give them a smooth finish.
Then paint. My cabinets took 3 coats of paint each, but the paint dries so quickly, by the time I painted the last cabinet the first one was dry so I started over. It was just a constant run of painting for 10 hours. Exciting!
I used a Semi-Gloss so that they'll clean easily. I probably could have gotten away with less coats of paint had I used an eggshell, but since I was going with white I needed them to be easy to wipe clean.

Mid-project we decided to do away with this entire section of cabinets to open up the room. Best decision ever. I lost a lot of storage, but my kitchen is so airy and open now! Worth the sacrifice for sure!
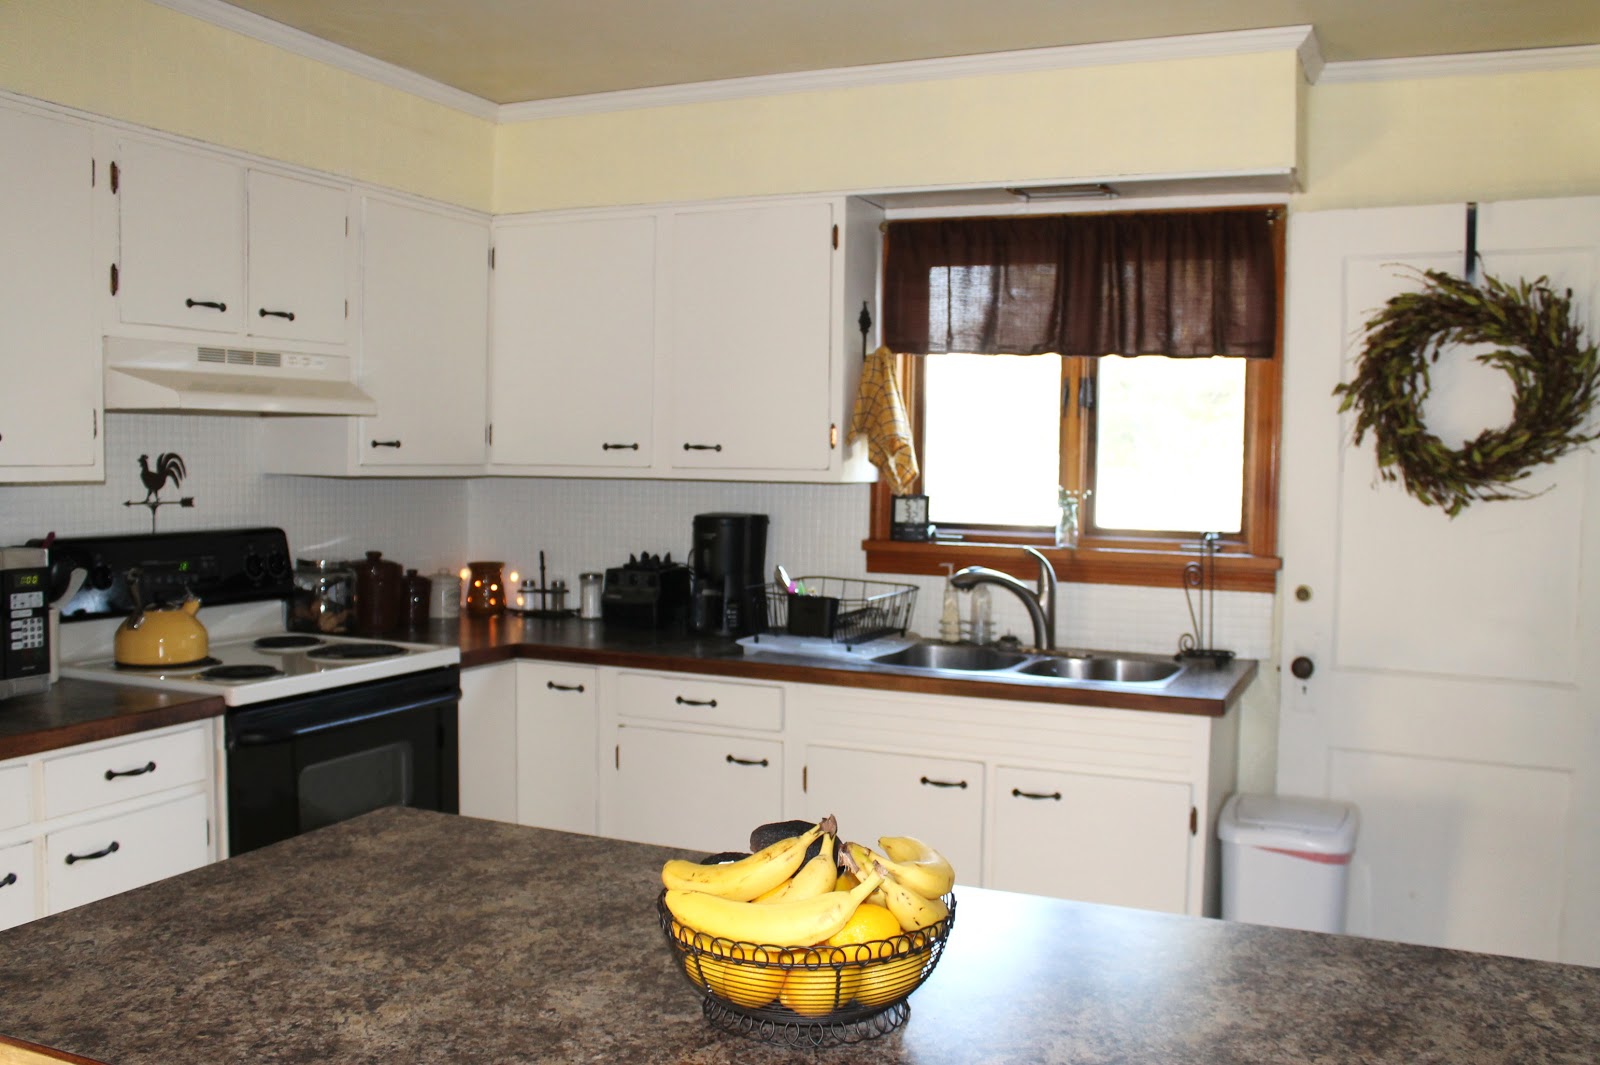

And....the end!
So, to recap.
-We spent about $100 when we first moved on the back splash and wallpaper.
-We added crown molding for about $40
-New sink faucet (also the best upgrade!!!!!) $99
-Painted cabinets $18 (1 can of paint)
We were able to get away with using the same hardware!
**Total $257 for what looks like an entirely new kitchen!!**
Work with what you have!! You don't need to spend $20,000 on a Kitchen remodel - I mean, unless you really want to.
Get creative and be willing to work a little and you can totally transform your kitchen!

Hope this helps anyone looking to do a remodel on a BUDGET!
I'll post our bathroom remodel soon!!! We totally transformed our bathroom for next to NOTHING!
LOVE IT!! so siked I found your Blog!
ReplyDeleteThank you for sharing this information.
ReplyDeleteKichen Remodeling